Explore the JHipster code
Previously in the “Better Java Projects Faster with JHipster and Docker” tutorial
In
the second installment of the “Better Java Projects Faster with JHipster and Docker” tutorial,
we first installed all the software we need. Then we generated and ran the JHipster application. Finally, we explored its
administration and entity sections. Your project source code should look like
the “master” branch of the GitHub project.
Goals for this installment
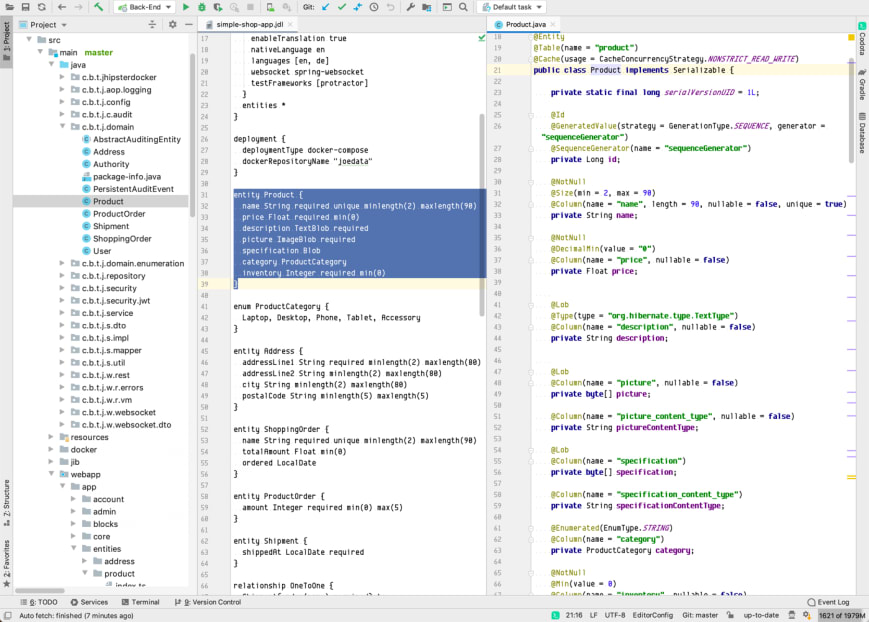
In this third installment of the tutorial, we look at the JHipster code in our IDE:
- We install or configure either Eclipse or IntelliJ for Spring Boot and Angular.
- We import the project into either Eclipse or IntelliJ.
- We inspect the code that JHipster created for our entities.
Want more?
If you want to read the whole tutorial, then head over to the third installment of the “Better Java Projects Faster with JHipster and Docker” tutorial.
Java Tech Popularity Index Q4/2023:
Developer job ads dipped 30% in 2023. Monthly Stack Overflow questions dropped 42% since ChatGPT, with JavaScript at -56% and Python at -59%. Since June 22, Udemy's first-time Python course purchases have outpaced Java's 7.1 million to 2 million. Job ads for Quarkus and Micronaut continue to rebound.
Developer job ads dipped 30% in 2023. Monthly Stack Overflow questions dropped 42% since ChatGPT, with JavaScript at -56% and Python at -59%. Since June 22, Udemy's first-time Python course purchases have outpaced Java's 7.1 million to 2 million. Job ads for Quarkus and Micronaut continue to rebound.
Read my newsletter
comments powered by Disqus